Written By Michael Tobisch
2020-09-02
Do you know Database Mail? Those who administer an MS SQL Server apart from the Express Edition might know it, and there is a nice interface to configure it in SQL Server Management Studio (SSMS). But this interface is missing in the Express Edition. The reason for that is that the SQL Server Agent Services are not present in this edition, which does not let us configure maintainence tasks or Database Mail. These services use the MSDB database, and this database is installed as one of the system databases, even in SQL Server Express Edition. With a few SQL statements we can activate and configure Database Mail, and make use of this feature.
To activate Database Mail, we use Stored Procedures from the MSDB database of SQL Server Express Edition - everything is here, we just have to use it. And don't believe some experts who post in SQL Server forums or Stackoverflow that this is not possible ;-)
At the end of this article I will give you an example how to use it in a specific DNN module.
Why Database Mail
The "normal" reason is very simple, it is to notify someone when a maintainance task is completed or if some errors occured. But it could also be used in Stored Procedures to notify someone about added or deleted records, exceptions that appeared etc. There are a lot of usecases, but mainly, it is a management tool to support maintenance.
Enable Database Mail XPs
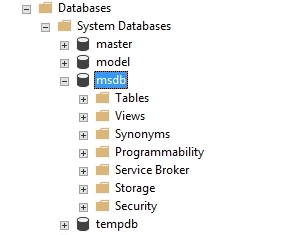
Ok, let's start by activating Database Mail. Start SSMS, and connect to your SQL Server using a sysadmin account, e.g. sa. Then select MSDB:
To enable Database Mail on your server you have to enable the Database Mail Extended Procedures (XP), which are disabled by default. Use this little query:
USE msdb

GO
sp_configure 'show advanced options', 1;

GO
RECONFIGURE;

GO
sp_configure 'Database Mail XPs', 1;

GO
RECONFIGURE

GO
Add a Database Mail Profile
A Database Mail Profile is an ordered collection of Database Mail Accounts (see below). The profile is used by clients and applications to send emails. It does not hold any information about mail servers or email addresses, therefore accounts included in the profile can be changed easily without changing the application settings.
For more information about Database Mail profiles read Database Mail Profile.
To create a profile, run the following query:
USE msdb

GO
EXECUTE dbo.sysmail_add_profile_sp

   @profile_name = 'SQL_Express_Mail',

   @description = 'SQL Mail on SQL Express Server'
It does not really matter how you name the profile, and the description is not mandatory, you can use an empty string or even NULL for it.
Add a Database Mail Account
A Database Mail account holds the information that Microsoft SQL Server needs to send email messages to an SMTP server. Each account contains information for one e-mail server. You have to create an account on your mail server, or use an existing one.
For more information about Database Mail accounts read Database Mail Account.
This query creates a Database Mail Account:
USE msdb

GO
EXECUTE dbo.sysmail_add_account_sp

   @account_name = 'DNN Administrator',

   @email_address = '[email protected]',

   @display_name = 'Master of the DNN sites',

   @replyto_address = NULL,

   @description = NULL,

   @mailserver_name = 'mail.mydomain.com',

   @mailserver_type = 'SMTP',

   @port = 25,

   @username = NULL,

   @password = NULL,

   @enable_ssl = 0
Of course you have to change the values, here is a short description of the parameters (mandatory parameters are in bold, optional parameters in italic):
- @account_name: The name of the account which you want to add.
- @email_address: The sender's address of emails being sent by SQL Server, this must be a valid email address.
- @display_name: If you want a meaningful sender's name displayed in the email instead of the sender's address, you can add it here.
- @replyto_address: This is the optional reply-to address
- @description: If you want, you can add a description of the accout.
- @mailserver_name: You have to enter the name or IP address of your mail server.
- @mailserver_type: Only SMTP is supported at the moment.
- @port: Enter the port number of your SMTP server.
- @username: Enter the username for your mail server if necessary. For anonymous access, use NULL.
- @password: Enter the user name's password for your mail server if necessary. For anonymous access, use NULL.
- @enable_ssl: Use 1 if the communication with your mail server is encrypted, otherwise 0.
Add the Account to the Profile
The last step is to assign the Database Mail account to the Database Mail profile. This can be done with the following query:
USE msdb

GO
EXECUTE dbo.sysmail_add_profileaccount_sp

   @profile_name = 'SQL_Express_Mail',

   @account_name = 'DNN Administrator',

   @sequence_number = 1
Use the profile name and account name defined in the previous query. The only interesting parameter here is the sequence number. This is of type int and determines the order in which accounts are used in the profile. Database Mail first uses the account with the lowest sequence number. If that fails, it tries to use the account with the next highest sequence number, and so on. If more than one account exists with the same sequence number, Database Mail will only use one of those accounts for a given e-mail message. In this case, Database Mail makes no guarantees as to which of the accounts is used for that sequence number or that the same account is used from message to message.
For more information about this read sysmail_add_profileaccount_sp.
Example: Better GDPR compliance with OpenForms
(@Sacha: excuse me. And don't be annoyed that I use your module as an example)
The GDPR forces us to delete data that are not in use anymore after a defined period of time (simply said). There are many DNN extensions around that do not provide such an automated functionality (even if it should be easy to write a scheduler client that could do the job). Let's assume you use OpenForm, a very popular extension for creating contact forms and alike. What you want is to delete submissions that are older than say 6 months. The only way to do it is to manually delete every single submission (or a bunch of submissions) from the database (and don't forget to restart the application pool after that). At the end, you want an email telling you if the job succeeded, and how many records were deleted.
Here is the query to do that:
SET NOCOUNT ON;

DECLARE @RecordsToDelete int

DECLARE @Subject nvarchar(50)

DECLARE @Body nvarchar(max)
TRY

   BEGIN TRANSACTION

      SELECT @RecordsToDelete = COUNT(*) FROM dbo.OpenForm_Items

      WHERE LastModifiedOnDate < DATEADD(month, -6, GETDATE())
      DELETE FROM dbo.OpenForm_Items

      WHERE LastModifiedOnDate < DATEADD(month, -6, GETDATE())
      SET @Subject = 'Successful deleted old records from OpenForm'

      SET @Body = 'Deletion completed. ' + CAST(@RecordsToDelete AS nvarchar(max)) +

         ' records deleted.'
COMMIT TRANSACTION
END TRY
BEGIN CATCH

   ROLLBACK TRANSACTION
   SET @Subject = 'Deletion of old records from OpenForm failed'

   SET @Body = 'Error Number: ' + CAST(ERROR_NUMBER() AS nvarchar(max)) +

      CHAR(13) + CHAR(10) +

      'Line: ' + CAST(ERROR_LINE() AS nvarchar(10)) +

      CHAR(13) + CHAR(10) +

      'Error Message: ' + ERROR_MESSAGE() +

      CHAR(13) + CHAR(10) +

      'Severity: ' + CAST(ERROR_SEVERITY() AS nvarchar(max)) +

      CHAR(13) + CHAR(10)

END CATCH
EXECUTE msdb.dbo.sp_send_dbmail

   @profile_name = 'SQL_Express_Mail',

   @recipients = '[email protected]',

   @copy_recipients = NULL,

   @blind_copy_recipients = NULL,

   @from_address = '[email protected]',

   @reply_to = NULL,

   @subject = @Subject,

   @body = @Body,

   @body_format = 'TEXT',

   @importance = 'Normal',

   @sensitivity = 'Normal',

   @file_attachments = NULL
I put that in a transaction because in other usecases it could be that you have to delete from more tables, or transfer anonymized or pseudonomynized data to another table, even another database, so you get the basic structure to do this correctly in this example. I have declared three variables, the names speak for itself, and the block starting with TRY and ending with END CATCH should be quite obvious.
The interesting stuff is the last block, after the END CATCH line. Here is a short description of the parameters:
- @profile_name: This is the name of the profile (see above).
- @recipients: Enter the email address of one or more recipients here. If you use more than one recipient, separate them by semi-colons (;).
- @copy_recipients: Enter the email address of one or more CC-Recipients (separated by semi-colons). Use NULL for none.
- @blind_copy_recipients: Same for BCC-Recipients.
- @from_address: Enter the sender's email address.
- @reply_to: Enter a reply-to address or NULL, if none.
- @subject: The subject of the email.
- @body: The email's text body.
- @body_format: The email's body format. Can be TEXT or HTML.
- @importance: Can be Low, Normal, or High.
- @sensitivity: Can be Normal, Personal, Private, or Confidential.
- @file_attachments: NULL for no attachments, otherwise the fully qualified name (incl. path) to the attachemnt files (separated by semi-colons if more than one). The service account that runs SQL Server needs read access to these files.
For more information about sending emails read sp_send_dbmail.
Create Scheduled Task
Now we need to run this on a regular basis and then we are done. But how can we do that without the SQL Server Agent Services? The answer is easy: we use the Windows Task Scheduler.
First we have to create two files, the first one - let's call it DeleteOpenFormRecords.sql holds the query above. The second one is a batch file that calls an SQL command line tool called sqlcmd.exe (normally in C:\Program Files\Microsoft SQL Server\Client SDK\ODBC\110\Tools\Binn). With this tool we can start a connection to our SQL Server and execute an SQL script - to do that we write a batch file (name it DeleteOpenFormRecords.bat for instance) with the following content:
@ECHO OFF

SQLCMD -S MySqlServer -d DNN_Database -i C:\Scripts\DeleteOpenFormRecords.sql
Store both files in the same directory somewhere on your hard disk (e.g. C:\Scripts). Last thing to do is creating a Scheduled task that executes the batch file once a day. This can be done either with the graphical interface in Windows. Make sure to use SYSTEM as the user account to run the task, and check the "Run with highest privileges" checkbox.
You can also use the following command in an elevated ("Run as Administrator") shell:
SCHTASKS /CREATE /RU "NT AUTHORITY\SYSTEM" /SC DAILY

   /TN "Deletion of old records from OpenForm"

   /TR C:\Scripts\DeleteOpenFormRecords.bat /ST 06:00 /RL HIGHEST
That's it. Happy DNNing!